Save on Your Windows 10 Data Usage
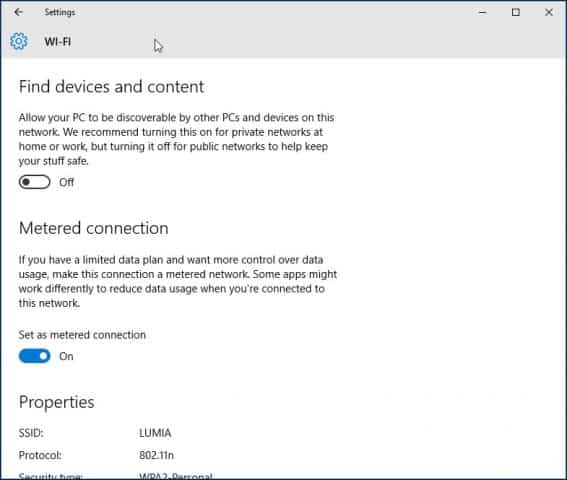
Set your connection as metered
One
of the first things you can do is set your connection as metered. This
will let Windows 10 know you don’t want significant updates and apps
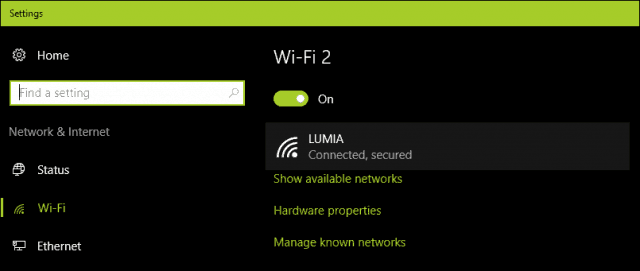
automatically downloaded. Go to Start > Settings > Network & Internet > Wi-Fi > Advanced Options.
Update: In the
Windows 10 Anniversary Update, Metered connection is now located under
Start > Settings >
Network & Internet > Wi-Fi > your connection name.
Then toggle Toggle on
Set as metered connection.
 Update 2:
 The
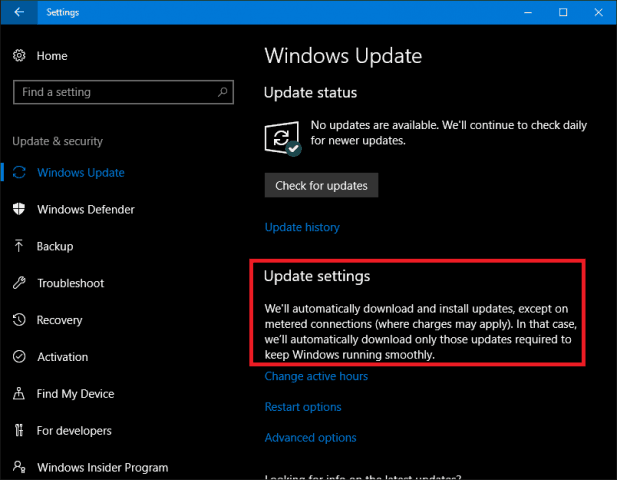
Windows 10 Creators Update makes it clearer about the installation of
critical updates. I feel indifferent about this, but at the same time, I
believe the company is not taking into account the realities of mobile
broadband limitations. Some of these security updates are likely to be
delivered as part of large cumulative updates, which exceed the
allotment of some data plans.
If your
2-day allotment is 300 MBs and a cumulative update is near 1 GB; you are
gonna run out of data before you can even apply the update. So, this is
something users will need to watch out for. Windows 10 Home users won’t
have any choice over the matter at all. With the premium business
editions such as Pro and Enterprise, you can defer the updates until a
suitable time. Hopefully, with
differential updates in Windows Update, users running the Creators Update won’t have to worry too much about updates eating up their data caps.
Speaking of metered connections, the Creators Update now lets users
set their Ethernet connections as metered.
This was only limited to Wi-Fi, but there were registry hacks you could
use in previous versions. Version 1703 makes it much as easier.
By
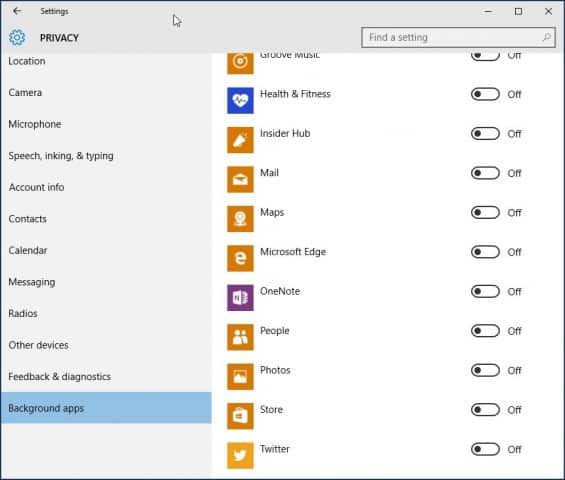
default, Windows 10 keeps some apps running in the background, and they
eat up a lot of data. In fact, the Mail app, in particular, is a major
offender. You can turn off some of these apps by going to
Settings > Privacy > Background apps.
Then
toggle off apps that use background data that you don’t need. In my
case, it was pretty much all of those apps that are listed. When Windows
Updates or new versions are installed, these settings might be reset,
so, periodically check it to make sure.
 OneDrive
OneDrive
was another part of Windows 10 I discovered sips data in the
background. Although disabling it might be a drastic step, since it’s a
critical selling point in the operating system, I don’t need to keep it
running all the time. I go into town once a week, so if there are some
files I need to sync, I do so at an Internet café.
To disable OneDrive, right-click the Taskbar and click Task Manager or press
CTRL + SHIFT + ESC.
Select
the startup tab Then under the Startup tab you can disable OneDrive.
For more on this type of action, check out our article:
How to Disable Startup Programs in Windows 10.
You might also want to do this for other syncing clients such as
Dropbox or Google Drive.
 Disable PC Syncing
It
may sound odd to disable such a hallmark feature in Windows 10. I love
PC syncing, but I honestly don’t need to have it running around the
clock. You can turn it off, and when you do need to keep things synced,
you can easily turn it on.
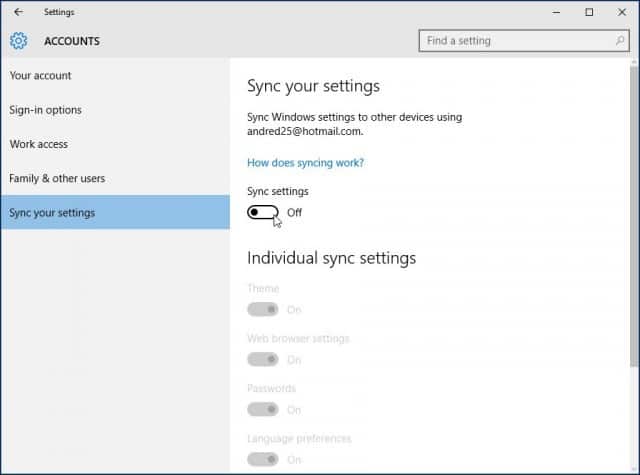
Go to
Settings > Accounts > Sync your settings and turn
Sync settings off.
NOTE: You can only sync your settings if you’re using a Microsoft account to log in to Windows. If you’re
using a local Windows account, the
Sync settings option is grayed out.
If you think it’s a bit too much to completely turn off syncing, you can pick and choose some settings to sync.
 Turn off notifications
Another
area that I notice can save you some data is turning off Action Center
Notifications. For instance, if you don’t need to have background apps
notifying you of on-going activities, just disable it. Right-click on
the Action Center icon in the system tray and select
Turn on quiet hours.
 Turn off Live Tiles
Feed-based
apps such as News will retrieve the latest news and other information
in the background. If you keep Live Tiles turned on. You don’t need to
do this for every app, but for select apps like Mail, Twitter, Weather,
and Facebook, you can keep it on. You can turn that off by
right-clicking on the Tile and “Turn off live tile”.
 Configure Windows Update to download updates over your local area network
Windows
10 introduces a cool enhancement to Windows Update I’m excited about;
the option to have Windows Update download updates from a PC within your
local network in a peer to peer fashion. It’s called Windows Update
Delivery Optimization (WUDO).
This is ideal for scenarios where you are using a metered connection and have multiple PCs running
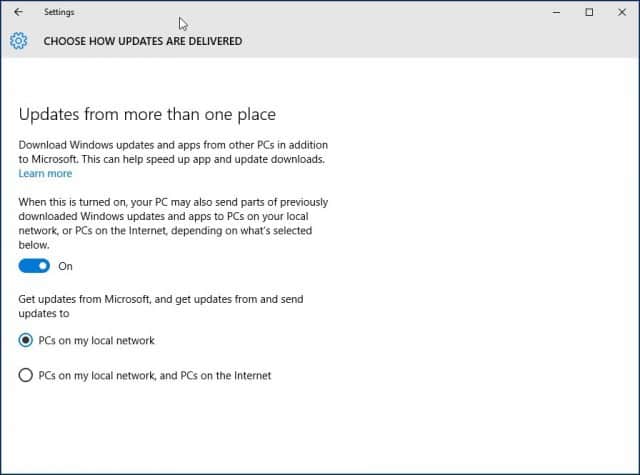
Windows 10. You can use one PC to update the other one as long as they are the same architecture. You can enable this by going to
Settings > Update & Security > Windows Update > Advanced Options > Choose how updates are delivered (yeah, it’s a setting that’s buried deep, unfortunately) and make sure it’s on. Also, make sure it’s set to
PCs on my Local Network.
Note
that WUDO is a controversial feature in Windows 10 for some. For
Windows 10 Home and Pro, it’s set to send Windows Update data to other
PCs on the Internet by default (it’s only set to PCs on my local network
for Enterprise and Education editions). If you’re in a limited
bandwidth situation, you don’t want to be sharing updates with other PCs
on the Internet. For more on WUDO, read our article:
Stop Windows 10 from Sharing Your Windows Updates to Other PCs.
Defer Windows Updates
If
you are running Windows 10 Pro or Enterprise, there is an option in
Windows Update settings that lets you delay the download of new features
for several months. This can be significant since new feature
improvements can be quite substantial. Also, this does not affect the
download and installation of security updates, and neither does not it
prevent the download of features indefinitely, but it’s a welcome
stop-gap. Please note, when Defer Windows Updates is enabled, it also
affects
Microsoft Office Updates.
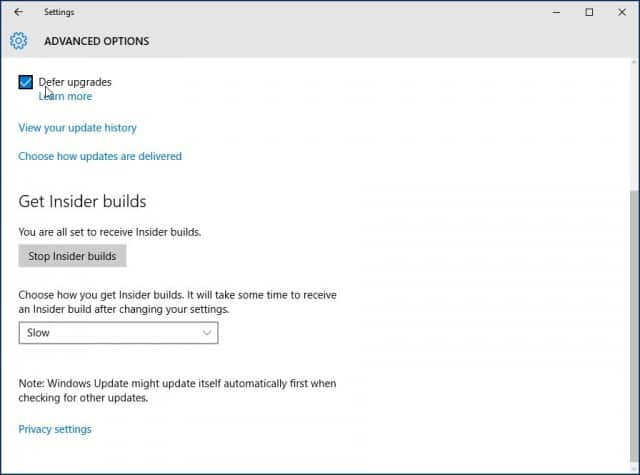
You can enable Defer Upgrades by going to
Settings > Update, and Security > Windows Update > Advanced Options scroll down a bit and check:
Defer upgrades.
The Pro, Enterprise and Education editions of Windows 10 Creators Update let you block updates completely up to 35 days,
see our article for instructions on how to do it.
Of
course, not all these strategies have to be implemented. Depending on
the type of plan you subscribe to, these tips will help you better
manage Windows 10’s data usage, and make it last longer.
Did I
miss anything? What are your favorite methods for limiting the amount of
data Windows 10 uses? Leave a comment below and let us know, or
continue the discussion in
our free Windows 10 Forums



Comments
Post a Comment