 Windows 10’s Bash shell
doesn’t officially support graphical Linux desktop applications.
Microsoft says this feature is designed only for developers who want to
run Linux terminal utilities. But the underlying “Windows Subsystem for
Linux” is more powerful than Microsoft lets on.
It is possible to run graphical Linux applications in Windows 10, but
bear in mind that it isn’t officially supported. Not every piece of
Linux software works, and graphical applications are even more complex
and less tested. But these should become more stable over time as
Microsoft improves the underlying Windows Subsystem for Linux.
Windows 10’s Bash shell only supports 64-bit binaries, so you can’t install and run 32-bit Linux software.
How This Works
First, let’s run down exactly how this works so you can have some understanding of what we’re doing here.
Windows 10 includes an underlying “Windows Subsystem for Linux” that allows Windows 10 to
run Linux software by translating Linux system calls to Windows system calls.
When you run a Linux distribution like Ubuntu, it downloads and
installs a complete Ubuntu user space image on your computer. This
includes the exact same binaries–or applications–that would run on
Ubuntu. That “Bash on Ubuntu on Windows” environment works thanks to the
underlying Windows Subsystem for Linux.
Microsoft doesn’t want to spend any time working on graphical
software, as this feature is intended for command-line developer
tools. But the main technical reason that graphical applications aren’t
supported is that they require an “X server” to provide that graphical
interface. On a typical Linux desktop, that “X server” automatically
appears when you boot your computer and it renders the entire desktop
and the applications you use.
But try opening a graphical application from Bash on Windows, though, and it will complain that it can’t open a display.

There are X server applications you can install on a Windows desktop,
however. Typically, these are used to render Linux applications running
on other computers–the “X11” protocol is rather old and was designed
with the ability run over a network connection.
If you install an X server application on your Windows desktop and
change a setting in the Bash shell, applications will send their
graphical output to the X server application and they’ll appear on your
Windows desktop. Everything should work fine, assuming those
applications don’t depend on Linux system calls that the
Windows Subsystem for Linux doesn’t yet support.
Step One: Install an X Server
There are several different X servers you could install on Windows, but we recommend
Xming. Download it and install it on your Windows 10 PC.
The installation process is simple: You can just accept the default
settings. It will then automatically launch and run in your system tray,
waiting for you to run graphical programs.

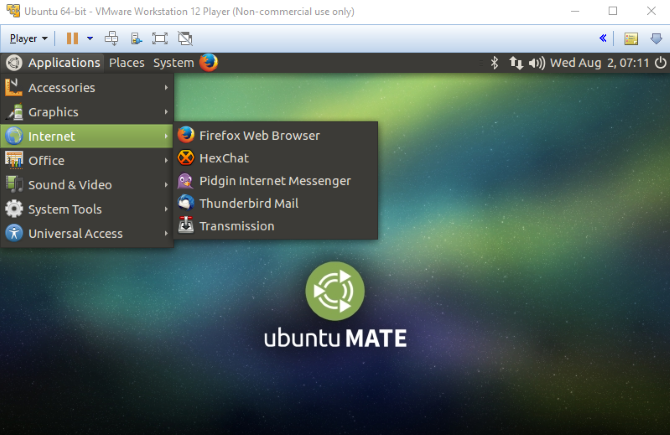
Step Two: Install the Program
You can install graphical Linux desktop programs like you can any other program,
using the apt-get command
in the Ubuntu-based Bash environment. For example, let’s say you’d want
to install the graphical, GTK-based vim editor. You’d run the following
command in the Bash window:
sudo apt-get install vim-gtk

It will go through the installation process in the command line window, just like it does on Ubuntu.
Step Three: Set Your Display Environment Variable
Now, you’ll need to set the “DISPLAY” environment variable to point
at the X server running on your Windows 10 PC. If you don’t do this,
graphical applications will simply fail to launch.
To do this, run the following command in the Bash environment:
export DISPLAY=:0
This setting only applies to your current Bash session. If you close
the window, Bash will forget it. You’ll have to run this command each
time you reopen Bash and want to run a graphical application.

Step Four: Launch an Application
You can now just launch a graphical application by typing the name of
its executable, like you’d type any other command. For example, to
launch vim-gtk, you’d run:
gvim
It’s that simple. If the application crashes after launching, the
Linux system calls it requires may not be supported by the Windows
Subsystem for Linux. There’s not much you can do about this. But give it
a shot, and you may find that the apps you need work decently well!

You can also combine the third and fourth steps, if you like. Rather
than exporting the DISPLAY variable once for an entire Bash shell
session, you’d just run a graphical application with the following
command:
DISPLAY=:0 command
For example, to launch gvim, you’d run:
DISPLAY=:0 gvim
OR
Run Linux in a Virtual Machine
Not
all versions of Windows can run Bash or get a GUI using the Windows
Subsystem for Linux. Fortunately, there is an alternative:
virtualization!
Using a virtual machine such as
VMware Player or VirtualBox, you can create a virtual hardware environment (limited only by the physical hardware constrains of your computer).
Cooperative
Linux (shortened to coLinux) is a port of the Linux kernel, designed to
allow it to run alongside another operating system (cooperatively).
With coLinux, you can run Linux on a Windows computer without relying on
virtualization. There is also support for BSD and macOS.
What
this means is that you can run Linux apps and other software on your PC
alongside your Windows software. They literally share screen space as
separate apps, making the task of quickly switching to a Linux app as
easy as it gets.
With a compact 7.5MB download, coLinux is worth
installing to find out if it will support the sort of activity you have
in mind. If not, other solutions are open to you.
Remotely Access an Existing Linux Computer
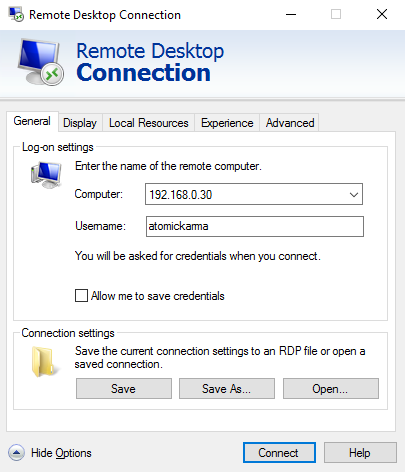
While
not an exact definition of “running Linux apps on Windows”, using
remote tools is still an option. Three are commonly available:
- Remote Desktop Protocol (RDP)
- Virtual Network Computing (VNC)
- Secure Shell (SSH)
With RDP and VNC, you can connect to a remote Linux computer
(which might be in the next room, or even thousands of miles away) and
access it via an application window. Here, software can be launched and
the terminal accessed as you would expect.
SSH, meanwhile, gives
remote access to a terminal session, enabling you to use the command
line to manage files and folders, update and install software, etc.
Of
these three potential solutions, RDP is probably the best option. The
RDP tool is already built into Windows 10 (unlike VNC, which requires
additional software), so all you need to do is install xrdp on your
target Linux device. However, if SSH is already enabled on Linux, then
you’ll be able to easily remote connect to the command line via an SSH
tool like PuTTY.

Comments
Post a Comment